The
Science Notebook
Gilbert Glass Blowing - Part I
The
Science Notebook
Gilbert Glass Blowing - Part I
NOTE: This book was published in as a manual
to accompany the Gilbert Glassblowing Set as part of the "Boy
Engineering" Series. the exact copyright date is
unknown, although based on information from "The Internet Archive" it is believed
that this publication is in the public domain. Many
today would not consider glassblowing to be a safe activity
for young people. Therefore, this book is
probably best appreciated for its historical value rather than
as a source for current information and experiments.
If you try anything here, please understand
that you do so at your own risk. See our Terms
of
Use.
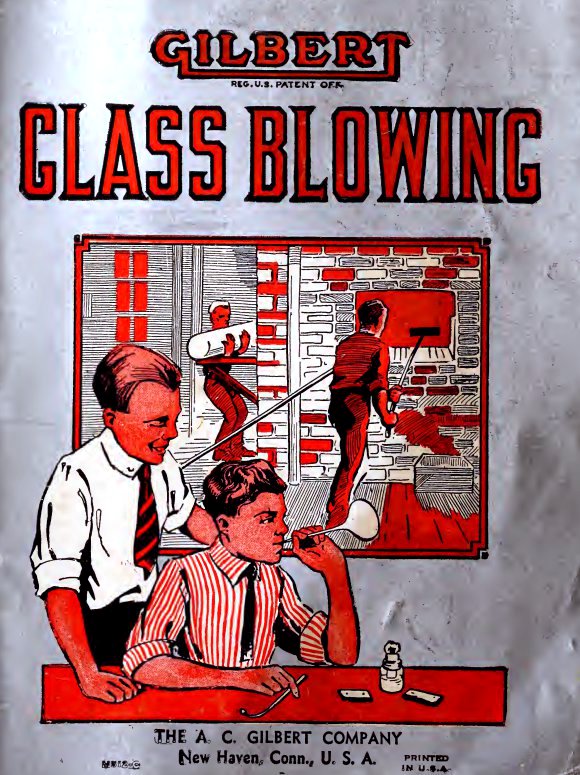
Cover - Page 10
Experimental Glass Blowing
FOR BOYS
CARLETON J. LYNDE, Ph.D.
Professor of Physics
MacDonald College, Quebec Province, Canada
Prepared under the direction of
ALFRED C. GILBERT
Yale University, 1909
EXPERIMENTAL GLASS BLOWING
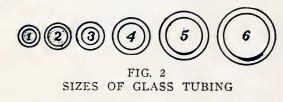
Boys, glass tubes are made in the sizes shown in Fig. 2, and in
larger sizes. You will use sizes 2, 4, and 6 in the following
experiments.
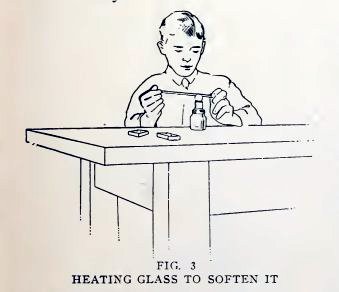
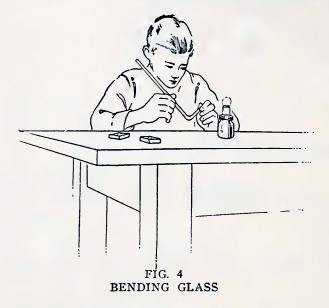
Experiment 1. Fun bending glass.
Hold a piece of No. 2, with both hands, in the flame of the alcohol
lamp, and turn it constantly (Fig. 3). Do you find that when the
glass becomes nearly red hot, it becomes soft and bends easily?
Take the tube out of the flame, bend it into any shape you wish
(Fig. 4), and allow it to cool. Do you find that the glass hardens
when it cools and retains the bent shape?
Heat the tube near the first bend, turn it constantly, take it out
of the flame, and make another bend.
Repeat this and make all kinds of fantastic shapes.
Place all hot glass on the cooling blocks, not on the table.
Glass is used in many, many ways by the human race; for example, to
make bottles, tumblers, window glass, and so on, and
2
BOY ENGINEERING
all of these uses depend upon the facts which you have just
illustrated, namely, that glass becomes soft when heated and hard
when cooled again.
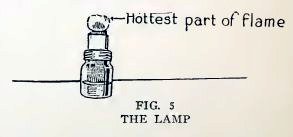
THE LAMP
The wick should be cut straight across and should project above the
wick holder about 1/8 inch (Fig. 5), or a little more if you require
more heat. Burn wood alcohol or grain alcohol, because they give
flames without soot or smoke. Fill the lamp to within a 1/2 inch of
the top only ;it will burn one hour. The hottest part of the flame
is not down close to the wick, as most beginners suppose, but up
just beneath the tip.
Buy your alcohol at a drug store in quantities of one pint or more.
When you are through experimenting for the day pour the alcohol from
the lamp back into the pint bottle and cork the bottle tightly.
Alcohol left in the lamp gradually evaporates and is lost.
Do not let the lamp stand with alcohol in it for any considerable
time — overnight for example — because fuel alcohol contains water
and when it evaporates from the wick, the alcohol evapor-
GLASS
BLOWING 3
ates first and leaves the water in the wick. Then when you try to
light the wick again, you will find that you cannot do so, because,
of course, water does not burn. If this happens to you, take the
wick out, dry it, and start the lamp again.
It is perfectly safe to use kerosene in the lamp, but it gives a
very smoky flame, which deposits soot on the glass and fills the air
with soot particles. Your mother will object very strenuously to
this because the soot particles settle and blacken everything. Burn
alcohol only, at least in the house.
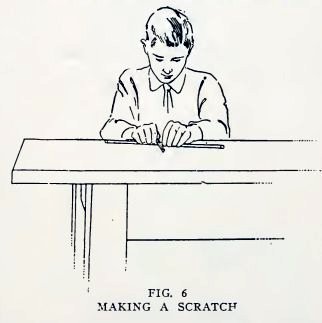
Experiment 2. To cut glass tubing.
Cut off a six-inch length of No. 2 as follows: Lay the tube flat on
the table, mark the six-inch length and draw the file across the
tube at this point, pressing hard enough to make a good scratch
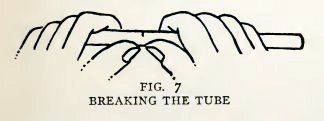
(Fig. 6). Grasp the tube with both hands near the scratch, as in
Fig. 7, pull apart and bend slightly. Do
you find that the tube breaks across easily? Repeat this with No. 4
and No. 6 tubes.
4
BOY ENGINEERING
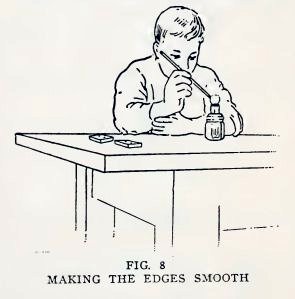
Experiment 3. To make the edges
smooth.
Hold one end of the six-inch piece of No. 2 in the tip of the flame
(Fig. 8), and turn constantly until it is just red hot. Take it out
and let it cool on the blocks. Do you find that the edges are
smooth?
Repeat with the other end.
Repeat with both ends of the six-inch piece of No. 4.
If thick glass is heated quickly it may crack, because the hot
exterior expands more quickly than the cooler interior and produces
internal strains. The No. 6 tube is comparatively thick and should
be heated gradually as follows : Hold the end in the flame for about
1 second, then withdraw it for about 1 second; hold it in the flame
again for 1 second, and withdraw it for 1 second. Repeat this eight
or ten times, then hold and turn it in the flame until red hot.
GLASS
BLOWING 5
Smooth both ends of the No. 6 piece in this way.
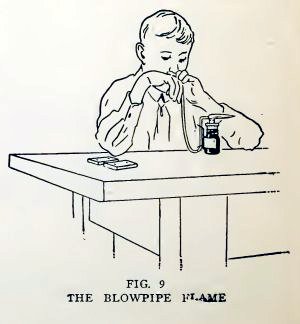
Experiment 4. Practice with the
blowpipe.
Hold the small end of the blowpipe just inside the flame at one
edge, about 1/8 inch above the wick (Fig. 9), and blow air through
the flame parallel to the top of the wick.
Keep your mouth closed on the blowpipe, breathe through your nose,
and practice keeping a steady stream of air going for a long time.
You will be able to do this with a little practice.
Do you observe that the blowpipe flame is pointed, also that it is
made up of a pointed cone inside and a lighter-colored cone outside?
The hottest part of the flame is inside the outer cone just beyond
the point of the inner cone.
The blowpipe flame is hotter than the lamp flame because the heat of
the burning alcohol is concentrated at one point by means of the air
blast, and because the alcohol is more completely burned by the
extra air.
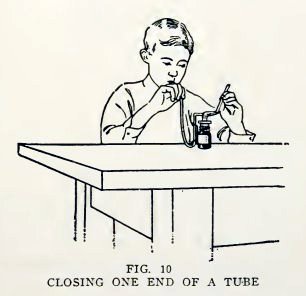
Experiment 5. To close the end of a
small tube.
Hold one end of a piece of No. 2 tube in the blowpipe flame (Fig.
10), turn it slowly, and heat until the end closes. Does it close
nicely?
Close one end of a piece of No. 4 in the same way.
You can close No. 6 tubing in this way, but it leaves a large lump
of glass which may crack on cooling or on reheating. You will
practice closing No. 6 tubing later.
6
BOY ENGINEERING
The "why" of it
The glass becomes soft when heated because it becomes almost a
liquid, and if it is heated sufficiently it becomes entirely
a liquid. In this respect it acts very much as pitch, rosin, and wax
act when heated by the sun or by a fire.
The end of a glass tube becomes smooth, or closes entirely, when
heated, for the following reason : The surface of any
liquid tries to take the smallest possible area (this is explained
in detail under "Surface Tension" in the Gilbert book on
"Experimental Mechanics"), for example, a small particle of water
takes the shape of a drop, a sphere, and the surface of a sphere has
the least area for a given amount of water. Now when the end of the
glass tube is heated it becomes a liquid, and the surface of this
liquid contracts the glass into a smooth rounded surface of least
area. If the tube is heated still more, the surface contracts still
more and closes the end.
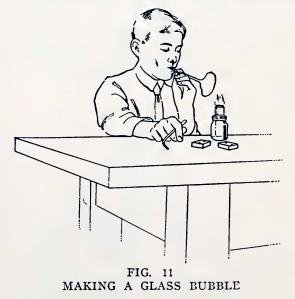
Experiment 6. Fun blowing glass
bubbles.
Smooth one end of a piece of No. 2 tube and allow it to cool. Close
the other end in the blowpipe flame, turn it slowly, and heat until
it is very hot. Take the tube out of the flame, put the smooth end
into your mouth quickly, and blow as hard as you can (Fig. 11). Do
you get a fine big glass bubble which bursts with a pop?
GLASS
BLOWING 7
If you get only a small bulb at the first trial, heat the end, and
try again. Do you find that the bulb shrinks when heated but blows
out again readily?
When you get a big bubble, place the bubble end of the tube on a
cooling block and break all the thin glass away from the tube by
striking it with the file or blowpipe. Then close the end and blow
another bubble.
Repeat until you can blow bubbles easily.
Repeat with a piece of No. 4 tube.
BUBBLE COLORS
Do you find that the thin glass of the bubbles shows colors,
especially in sunlight, just as soap bubbles do? You boys who
have had the Gilbert set on "Light Experiments" will know that these
colors are due to "interference." The colors produced by a thin film
of oil on water are also produced by "interference."
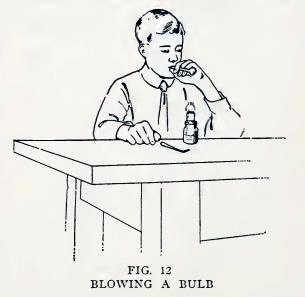
Experiment 7. To make water
balloons.
Close one end of the No. 2 tube in the blowpipe flame again and
while it is still hot blow carefully into the open end until you
have a bulb about 1/2i inch in diameter (Fig. 12). Now let it cool,
8
BOY ENGINEERING
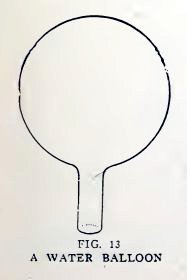
Make a scratch with the file about 1/4 inch from the bulb, break the
tube at this point (Fig. 13), and smooth the rough edge.
Put the bulb in a tumbler of water. Does it float? If not, make
another balloon with a larger bulb.
Experiment 8. Magic.
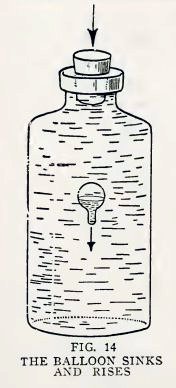
Find a large bottle made of clear glass, the neck of which will fit
your solid rubber stopper.
Fill the bottle with water to overflowing, insert the balloon, and
then the stopper.
Now press down hard on the stopper. Does the balloon sink in a most
magical manner (Fig. 14)?
Release the stopper. Does the balloon rise in an equally magical
manner?
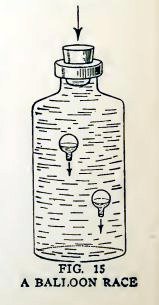
Experiment 9. Balloon races.
Make another water balloon. Put the two balloons together in the
bottle filled to overflowing with water.
Insert the stopper and press down hard. Do the balloons sink (Fig.
15), and does one sink more quickly than the other?
Release the stopper. Do the balloons rise, and does one rise more
quickly than the other ?
The most buoyant balloon sinks last and rises first.
GLASS
BLOWING 9
The "why" of it
You boys who have the Gilbert set on "Hydraulic and Pneumatic
Engineering" will know the "why" of the last three experiments. Any
body floats in water if it is lighter than an equal volume of water,
and it sinks if it is heavier than an equal volume of water. Water
is practically incompressible but air is very compressible: thus
when you press down on the stopper, you force water into the balloon
and compress the air in it; when you release the stopper, the
compressed air in the balloon expands and drives the water out. When
the weight of the balloon and the weight of the water in it are
together greater than the weight of water displaced by the balloon,
the balloon sinks; when they are less, it rises.
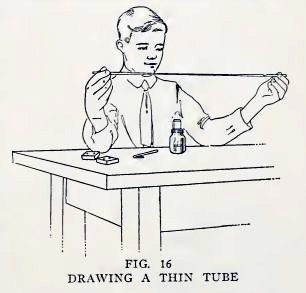
Experiment 10. Fun with thin tubes.
Hold a piece of No. 2 tubing in the lamp flame and turn it
constantly. When it is red hot and soft, take it out of the flame
and pull your hands apart until the tube is stretched ten or twelve
inches (Fig. 16). Is the tube in the shape shown in Fig. 17?
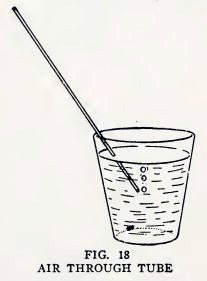
Allow the tube to cool, break the large ends away from the thin
tube, place one end of the thin tube in a glass of water, and
10
BOY ENGINEERING
blow into the other end to make air bubbles in the water (Fig. 18).
If you can do so, it is a real tube. Does the thin tube bend easily
and does it spring back when released?
Repeat the experiment with another piece of No. 2 tubing, but make
the thin tube as long as you can.
Can you blow air through the thin tube, and does it bend very easily
indeed?
Repeat with a piece of No. 4 tubing.
These thin hairlike tubes are called "capillary" tubes, from the
Latin word capillus, meaning a hair.
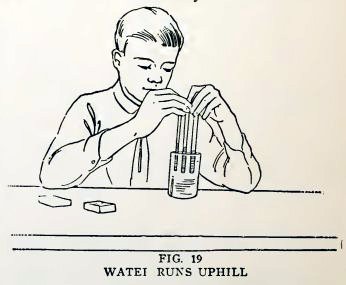
Experiment 11. Magic.
You have always heard that water runs downhill, but you will now see
it run uphill and remain there in a most magical manner.
Cut off 5-inch lengths of No. 6, No. 4, and No. 2 tubing, stand them
side by side in a glass full of water (Fig. 19), and move them up
and down in the water to wet the inside of the tubes.
"The Science Notebook"
Copyright 2008-2018 - Norman Young