GILBERT LIGHT
EXPERIMENTS 101
seat the party around the
table in the dark, light the alcohol, and look at your
neighbors' faces and at your own in a mirror. Do you all look
like ghosts? You do, because the salt in the flame gives only
yellow light, and since your rosy cheeks and rosy lips absorb
this color they appear black.
TRENCH FACES
Our boys at the front painted
their faces black (Fig. 153) before they started out on night
raids, because the black paint absorbed the light and
prevented their faces from being seen.
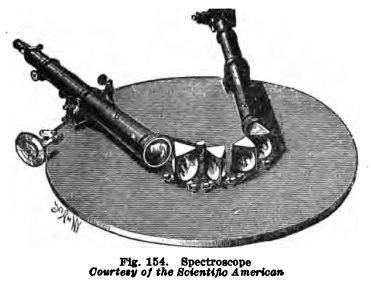
THE SPECTROSCOPE
When substances are vaporized
in a flame and the flame is viewed through a spectroscope
(Fig. 154) the spectrum seen is crossed by bright lines. Each
substance has its own particular lines, and when we know these
lines we can tell what substances are in the flame. This is
the basis of spectrum analysis. In the spectroscope shown here
the light passes through a narrow slit, through tube A, through four prisms,
and into the telescope B
in which the enlarged spectrum is seen.
102 GILBERT BOY
ENGINEERING
WHAT IS IN THE SUN
AND STARS?
When the light from the stars
is viewed in the spectroscope, the spectrum is crossed by dark
lines exactly corresponding to the bright lines mentioned
above. These are called the Fraunhofer lines, after their
discoverer. If, in the spectrum of light from the sun, for
example, we see dark lines exactly corresponding to the bright
lines produced by iron in the spectrum on the earth, we know
that there is iron in the sun, and so on.
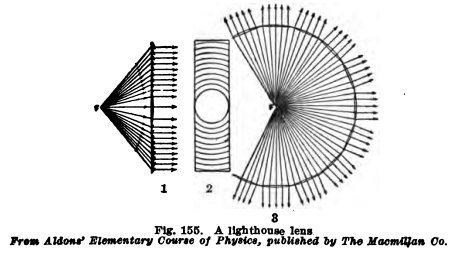
LIGHTHOUSE LENSES
Lighthouse lenses have at the
center a comparatively thin lens and around this prismatic
sections with greater and greater angle toward the edge, (1)
Fig. 155. Panels (2) made up in this way are placed completely
around the light F
(3). This gives a large, short focus lens which does not
absorb as much light as a solid thick lens would absorb.
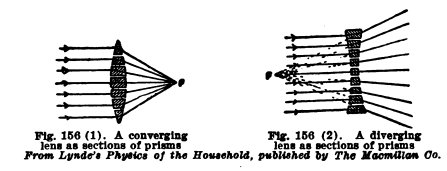
LENSES
Lenses are of two kinds,
converging and diverging. Converging lenses are thicker at the
middle than at the edges, and we may think of them as made up
of sections of prisms,
GILBERT LIGHT
EXPERIMENTS 103
Fig. 156 (1), the angles of
the prisms being greater the nearer they approach the edges.
These lenses converge parallel rays to a point F, called the focus.
Diverging lenses are thinner
at the middle than at the edges, and we may think of them as
made up of sections of prisms, Fig. 156 (3), with their thin
edges toward the center. These lenses diverge parallel rays
and make them appear to come from a point P, called an unreal
or virtual focus.
FUN WITH SUNLIGHT
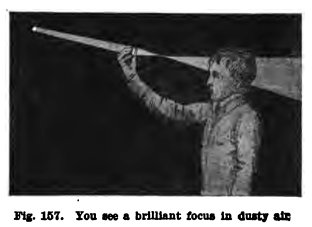
Experiment No. 98.
Converging lenses.
Allow sunlight to pass through
the slit in your darkened room, hold a converging lens in the
beam (Fig. 157) and make a dust. Do you see that the light
comes to a point and diverges afterward?
Repeat with the other converging lens. Is the light again
brought to a point but at a different distance from the lens?
104 GILBERT BOY
ENGINEERING
Experiment No. 99.
Diverging lens.
Repeat this experiment with your diverging lens. Is the light
diverged or spread?
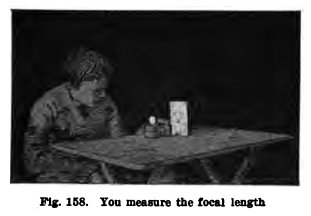
Experiment No. 100.
Focal lengths.
Remove your shutter,
focus the light with a converging lens, hold a piece of
paper at the point where you get the smallest and brightest
image of the sun (Fig. 158) and measure the distance from the
lens to the paper. The point is the focus and the distance is
the focal length of the lens.
Repeat with the other converging lens. (Do you find the focal
lengths of the lenses to be 4 inches and 8 inches
respectively?
Experiment No. 101.
Focal length of diverging lens.
Punch two nail holes exactly 1
inch apart in a piece of paper, put this in front of the
diverging lens, and measure the distance at which the spots of
sunlight appear 2 inches apart on a paper behind the lens.
This is the virtual focal length. Is it 4 inches?
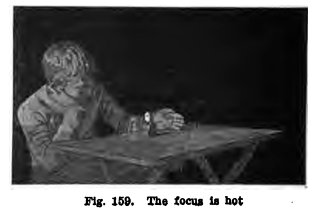
Experiment No. 102.
Is it hot?
Put your hand at the focus of
each converging lens in turn (Fig. 159). Is the sunlight hot?
It is, because all the light and heat
GILBERT LIGHT
EXPERIMENTS 105
which falls on the lens is concentrated at the focus.
Repeat with the diverging lens. Is there no heat?
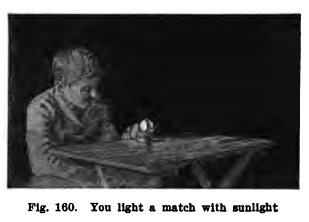
Experiment No. 103.
To light a match with sunlight.
When the sun is hot at mid-day
put a match on a piece of paper and focus sunlight on it with
the short focus lens (Fig. 160). Does it light? Why?
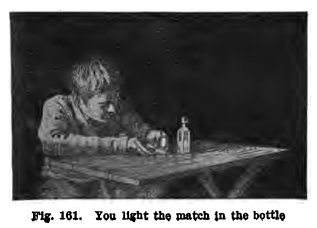
Experiment No. 104.
Magic cannon.
Repeat Experiment No. 59, but light the match by means of the
short focus lens (Fig. 161).
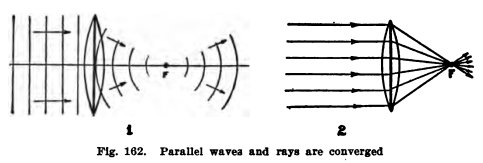
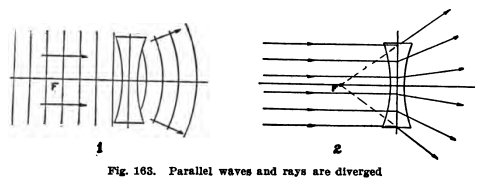
THE "WHY" OF IT
When the parallel waves from
the sun fall on a converging lens, which is thicker at the
middle than at the edges (Fig. 163), the portions of the waves
that go through the thick part are slowed up more than the
portions which go through the thinner parts, and as a. result
the waves are so curved in that they converge at the focus and
diverge afterward. The waves are shown
106 GILBERT BOY
ENGINEERING
in
1 and the rays in
2. This explains why these
lenses converge the light.
When parallel waves fall on a
diverging lens, which is thinner at the center than at the
edges, the portions which go through the center are less
delayed than the portions which go through the edges and the
waves are so curved out that they diverge after passing
through the lens. The waves are shown in 1, Fig, 163, and the rays
in 2. This explains
why these lenses diverge the light.
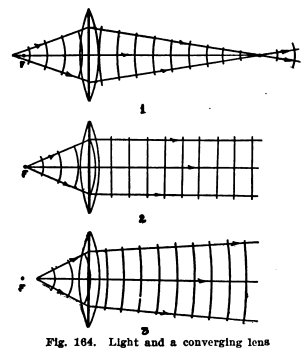
If the light comes from an
object near a converging lens the waves are curved when they
reach it, and one of three things may happen.
If the object is at a distance from the lens greater than the
focal length (1, Fig.
164), the curvature of the waves is reversed and the light is
brought to a point on the other side of the lens
GILBERT LIGHT
EXPERIMENTS 107
at a distance greater than the focal length.
If the light is at the focus(2, Fig. 164), the
curvature of the waves is so altered that they are parallel
after they pass through the lens.
If the light is nearer to the lens than the focus (3, Fig. 164), the
curvature of the waves is altered by the lens, but they still
diverge and will never converge.
FUN BY DAY OR NIGHT
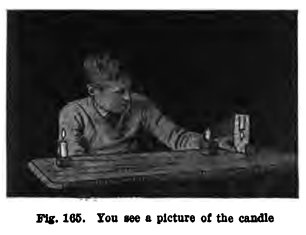
Experiment No. 105.
Images.
Arrange a candle, 4-inch
converging lens, and screen as in Fig. 165. Place the lighted
candle 3 feet from the lens and move the screen until you get
an image. Is it inverted and small? Repeat with candle at 3
feet and 1 foot. Is the image larger each time?
Place candle at twice the focal length, that is, 8 inches. Are
the candle image and candle the
108 GILBERT BOY
ENGINEERING
same size? Place candle at 6
inches. Is the image larger? Place candle at 5 inches. Is
the image larger still? Place candle at the focus. Is
the image very large? Place candle at 3 inches and 2 inches,
that is, closer than focus. Are no images formed?
Repeat with the converging lens of 8-inch focus. Place candle
at distance of 4 feet, 3 feet, 2 feet, 16 inches or twice the
focal length, 15 inches, 12 inches, 8 inches, and 6 inches.
Are the results similar?
Is the image smaller than the candle when the candle is at a
greater distance from the lens than twice the focal length? Is
it larger when the candle is at a distance less than twice the
focal length and greater than the focal length?
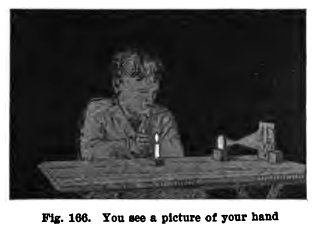
Experiment No. l06.
Picture shows.
With the candle, converging
lens, and screen, as in Fig. 166, get the image of the candle
on the screen, then hold your hand behind the candle and close
to it. Do you get an inverted picture of your hand in natural
colors?
Hold a black and white drawing upside down and close to the
candle. Do you get a picture right side up?
Repeat with colored drawings, colored flowers, and so on.
Do you get colored pictures?
Repeat with all kinds of things and use four or five candles
to get more light.
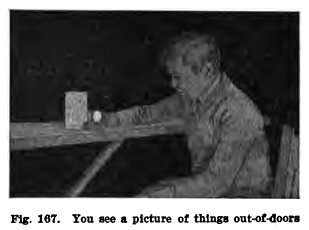
Experiment No. 107.
A picture of out-of-doors.
In the daytime, go to the side
of the room away from the window and get a picture of distant
objects on the screen (Fig. 167). Do you
GILBERT LIGHT
EXPERIMENTS 109
find a beautiful inverted
picture in natural colors of everything out-of-doors?
Measure the distance from lens to screen. This is again the
focal length of the lens. At night get a picture of a distant
light and measure the focal length.
Experiment No. 108.
The lenses and your eyes.
Hold the converging lenses in
turn at arm's length and look at distant objects. Is the image
small and inverted?
Hold them about one foot from your eye and look at your finger
held closer to the lens than its focal length. Is the image
large and right side up?
Repeat with the diverging lens. Is the image always right side
up and small?
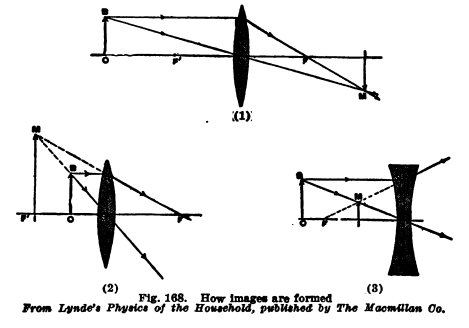
HOW THE IMAGES ARE FORMED
In Fig. 168 (1) the object OB
is at a greater distance than the focal length. All the rays
which fall on the lens from any point B meet at the point M and, therefore, the
image of B is at M. We cannot trace all the
rays, but it is necessary to trace only two. The two most
easily traced are the parallel ray BR and the ray BP which goes through the center of the lens.
Ray BE goes through
the focus F after it
goes through the lens; ray BP
goes straight ahead, or nearly so, because the two sides of
the lens are nearly parallel at the center.
The rays from all other points between B and O meet at points between M and I and, therefore, MI is the inverted image
of BO.
110 GILBERT BOY
ENGINEERING
In (2), BO is inside the
foous; therefore BR
and BP diverge after
they pass through the lens and do not form an image. Your eye,
however, makes an image because it sees the rays as though
they came from MI.
This explains why you see anything inside the focal length as
enlarged and right side up.
In (3), BO is outside
the virtual focus of the diverging lens. BR and BP diverge after they pass
through the lens and your eye sees the image MI. This explains
why diverging lenses always give images small and right side
up.
POWER OF A LENS
Spectacles are lenses, and
opticians measure the power of the spectacle lenses as
follows: If the lens has a focal length of 1 meter it is said
to have a power of 1 diopter; if it has a focal length of 1-2,
1-3, or 1-10 meter it is said to have a power of 2, 3, or 10
diopters; and so on. That is, the shorter the focal length the
greater the power.
GILBERT LIGHT
EXPERIMENTS 111
A meter is 100 centimeters
long. You will find on most ordinary rulers 30 divisions on
the side opposite the inch divisions; each of these divisions
is 1 centimeter, and 100 of these make a meter.
Experiment No. 109.
Power of your lenses.
Measure in centimeters the
focal length of the 8-inch lens. Do you find it to be 20
cms.? Is the power of the lens then
100
----- = 5 diopters?
20
Repeat with the 4-inch lens. Is its focal length 10 cms.
and its power
100
----- = 10 diopters?
10
Experiment No. 110.
Power of spectacles.
Measure in centimeters the
focal length of your father's or mother's spectacles and
calculate their power in diopters.
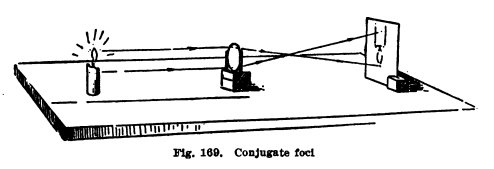
Experiment No. 111.
Conjugate foci.
Get the image of a candle as
in Fig. 169, mark the position of the screen and the candle,
and then exchange them. Do you again find an image, but of
different size?
Repeat at different distances.
Two points so situated with respect to a converging lens that
an object at either forms an image at the other are called
conjugate foci. There are an infinite number of pairs of such
points for each converging lens.
112 GILBERT BOY
ENGINEERING
RELATION BETWEEN
OBJECT AND IMAGE
If
Do is the distance of an
object from a lens and
Di is the distance of its
image from the lens, then
1 1
1
--- + ---
= ---
Do Di
F
where
F is the focal
length of the lens. This is one relation between the object and
its image.
The magnification of an image
is the number of times it is larger or smaller than the
object, and you can always find it by dividing Di
by Do; that is, the
magnification = Di / Do.
Experiment No. 112.
Where is the
image?
Arrange the 4-inch lens with the candle 6 inches from it.
Calculate where the image will be as follows:
Therefore D
i is 12. The image will be 12 inches
from the lens. Try it.
Now calculate and try where
the image will be if the object is 5 inches, 7 inches, 8
inches, 12 inches, 20 inches from the lens, and so on.
Repeat with the 8-inch lens, using
Do
greater than 8 inches.
Experiment No. 113.
How big will the image be?
Arrange the candle 6 inches from the 4-inch lens and the image
will be at 12 inches, as you found above.
Now, since magnification =
Di / Do,
it is 12 / 6 = 2, and the image will be 2 times as large
as the object. Measure the height of the flame and of its
image. Is the image 2 times as high as the flame? Try other
distances and then the other lens.
MAGIC
Experiment No. 114.
Cylindrical lens.
Look at your finger through a tumbler of water. Does the tumbler
of water act as a cylindrical lens and is your finger broad?
GILBERT LIGHT
EXPERIMENTS 113
Experiment No. 116.
Treble your
money.
Put a quarter in a tumbler
half full of water, put a saucer over the tumbler, and invert
both. Do you see a half dollar on the saucer and a quarter
higher up? Why?
Experiment No. 118.
Heat through ice.
Place the concave mirror
upside down on a sheet of clear ice 1/2 inch thick and let it
melt into the ice. Do you get an ice lens? At noon, when the
sun is hot, hold your hand at the focus of this lens. Is it
hot?
Experiment No. 117.
A spectrum from
ice.
Take a clear piece of ice,
shave it to the shape of a prism, and hold it in sunlight. Do
you get a beautiful spectrum?
OPTICAL INSTRUMENTS
FUN BY DAY OR NIGHT
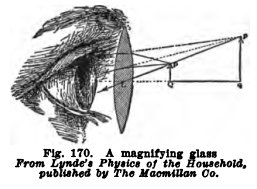
A Magnifying Glass is simply a converging lens
(Fig. 170) with the object PQ
closer than the focus. The eye receives rays which are still
diverging and sees the image pq enlarged. You have illustrated
this above.
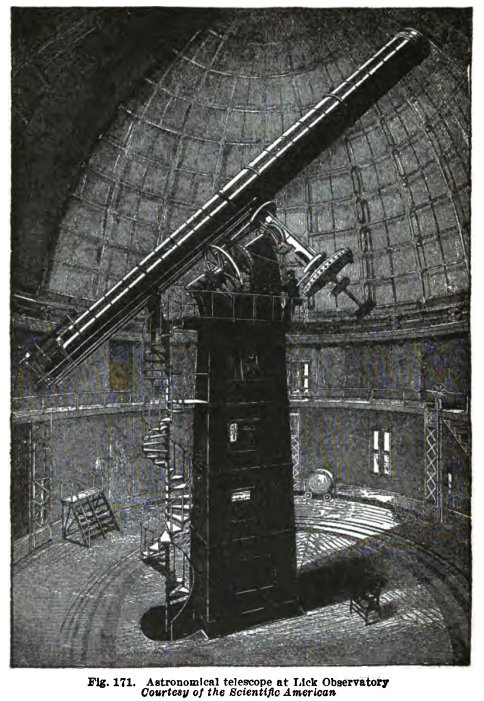
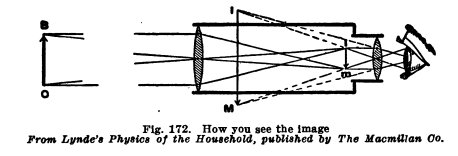
The Astronomical Telescope (Fig. 171) consists of
two converging lenses, or systems of lenses, connected by a
long tube. The lens nearest the object is called the
objective, and the lens nearest the eye, the eyepiece.
The objective (Fig, 172) forms a real inverted image of
the object BO inside
the focus of the eyepiece. The eyepiece magnifies this, just
as a magnifying glass does, and the eye sees the enlarged
image IM.
When the telescope is focused on a distant object: the dis-
114
GILBERT BOY ENGINEERING
GILBERT LIGHT
EXPERIMENTS 115
tance between the lenses is
equal to the sum of their focal lengths; and the magnification
is equal to the focal length of the objective divided by the
focal length of the eyepiece.
Terrestrial telescopes have,
between the objective and eyepiece, other lenses which turn
the image right side up.
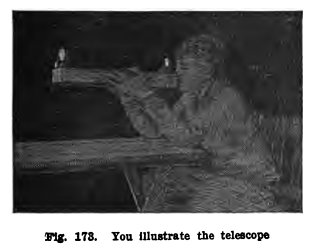
Experiment No. 118,
An astronomical telescope.
Arrange the converging lenses
on a piece of board (Fig. 173) and focus on a distant object.
Measure the distance between the lenses. Is it equal to the
sum of their focal lengths, that is, 8 + 4 = 12 inches?
Look at a distant object through the telescope with one eye
and outside the telescope with the other eye. Is the
magnification equal to focal length of objective
/ focal length of eyepiece, that is, 8 / 4 = 2 times?
Hold a piece of paper at the focus of the objective. Do you
get an image?
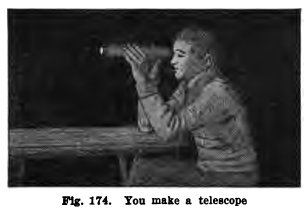
Experiment No. 119.
To make a telescope.
Place 8-inch lens in ring hold-
116 GILBERT BOY
ENGINEERING
er and wind dark wrapping
paper around the holder to make a tube 10 inches long. Place
4-inch lens in the other ring holder and wind wrapping paper
around the holder to make a tube 6 inches long. Slip the
second tube into the first and your telescope is made
(Fig, 174). Focus it on a distant object.
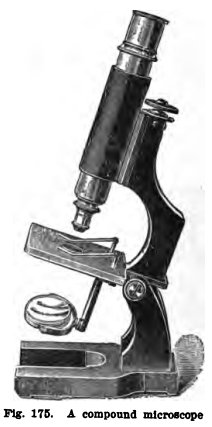
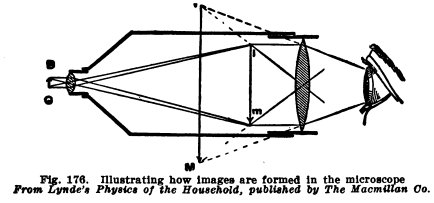
The Compound Microscope (Fig. 175) is the same in
principle as the astronomical telescope, but the objective has
very great power, that is, it has a very short focal length.
The objective forms a real image, im, Fig. 176, of BQ, and the eyepiece forms
the enlarged image IM
of im.
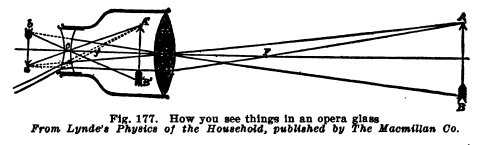
The Opera Glass (Fig. 177) has a converging lens C for objective and a
diverging lens c for
eyepiece. The objective would form an inverted image ab of AB, but the eyepiece
diverges the light and the eye sees the erect image A'B'. The ordinary opera
glass consists of two such instruments;
GILBERT LIGHT
EXPERIMENTS 117
they are shorter than the ordinary telescope and, therefore,
more convenient.
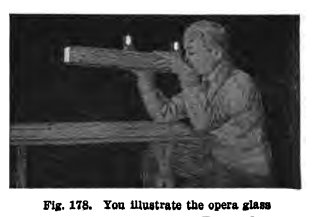
Experiment No. 120.
An opera glass.
Arrange the lenses on a piece
of board as in Fig, 178, Focus on an object. Is the image
erect and are the lenses closer together than in the
telescope?
Experiment No. 121.
To make an opera glass.
Place 8-inch lens in ring holder and wind around it a tube of
wrapping paper 3 inches long. Place
118 GILBERT BOY
ENGINEERING
the diverging lens in the
other ring holder and wind a tube 3 inches long. Insert the
second tube in the first and your opera glass is made. Focus
it on a distant object.
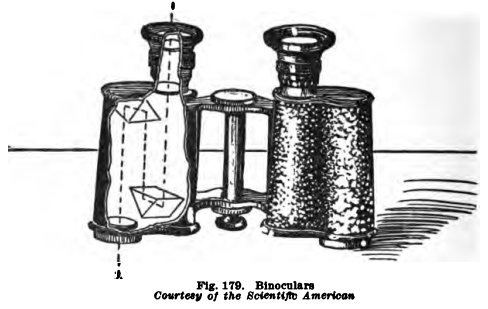
The Prism Binoculars (Fig. 179) are made with
lenses similar to those in an astronomical telescope, but the
light is reflected four times by means of glass prisms. This
reflection makes the image erect and shortens the length of
the tube.
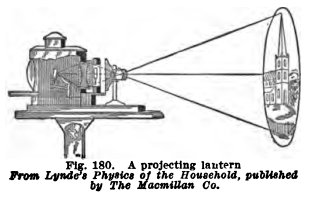
The Projecting Lantern (Fig. 180) consists of a
light-proof box, a source of bright light, a condensing lens,
a lantern slide, and a projecting lens. The bright
light,produced by electricity, acetylene, or as
GILBERT LIGHT
EXPERIMENTS 119
here, by a limelight, is
converged on the lantern slide by the condensing lens and an
image of the inverted slide is thrown on the screen by the
projecting lens.
The Postcard Lantern
consists of a light-proof box, two electric lights which
throw light on the postcard but not directly on the lens, a
postcard slide, and a converging lens which throws an image of
the postcard on the screen.
Experiment No. 122.
Magic-lantern
shows.
Place 4-inch lens in ring
holder in a hole in a large piece of cardboard, place a black
book 6 inches from lens and a white screen 13 inches from lens
on the other side, light the candles, and hold small objects
against the book. Are their images thrown on the screen in
natural colors and magnified twice?
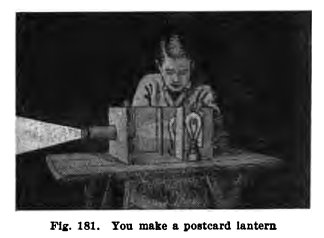
Experiment No. 123.
To make a
postcard lantern.
You can have lots of fun with a lantern made as follows:
Get a cardboard or wooden box
(Fig. 181) about 8" X 6' X 6", put the 8-inch lens in ring
holder and in a wrapping paper tube
120 GILBERT BOY
ENGINEERING
4 inches long; put the tube
into a hole in one side of the box and paint the opposite side
of the box black. Place an electric light or oil lamp on
each side of the postcard and close to it, and arrange two
shades to prevent the direct light from falling on the lens.
Hold a postcard, or other object, against the black end, focus
the lens on a white screen about 2' X 2', and your lantern is
finished. The illustration shows the lantern with the top and
one side removed. The top should have a trapdoor at the rear
end through which you can insert and remove the postcards. The
audience is seated on the side of the screen away from the
lantern.
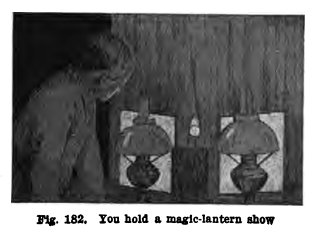
Experiment No. 124.
Fun at night.
You can put on a magic-lantern
show with oil lamps or electric lights as shown in Fig. 188.
The doorway between two rooms is covered by two heavy curtains
and the 8-inch lens in a ring holder is inserted in a hole in
a piece of cardboard and pinned between the two curtains. A
black book stands 10 inches from the lens, and is illuminated
by two strong lamps; two screens prevent the direct light of
the lamps from striking the lens. A white tissue paper or
cloth screen, 2' X 3', is on the opposite side of the door 40
inches from the lens, the audience is beyond the screen, and
if now you
GILBERT LIGHT
EXPERIMENTS 121
hold postcards,
drawings, and other small objects upside down
against the book, the lens will throw erect and enlarged
images on the screen, and your show is on.
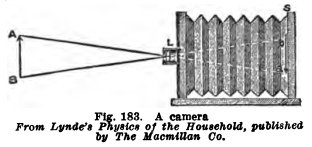
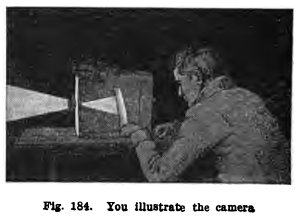
The Photographic Camera
is simply a light-proof box with a converging lens in one side
and a plate holder in the other. The lens L (Fig. 183) throws
an inverted image ba of the object AB on the plate
S.
Experiment No. 125.
To illustrate
the camera.
Put your converging lenses in
turn in a ring holder, and put the holder in a hole in one end
of a cardboard box (Fig, 184). Cover the box and your head
with a dark cloth and move the screen back and forth until you
get a picture.
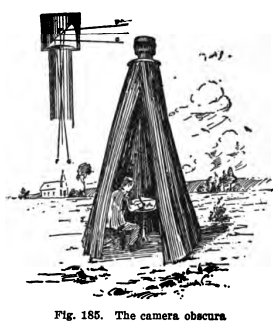
The Camera Obscura (Fig.185) has a combined
lens and reflecting prism at the top which throws a picture
down on the table in front of the artist.
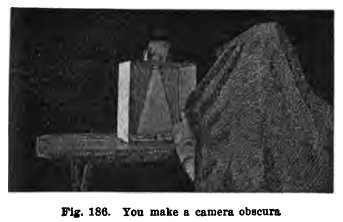
Experiment No. 126.
To make a camera ob-
122 GILBERT BOY
ENGINEERING
scura.
Arrange the 8-inch lens,
mirror, and box as in Fig, 186. Cover the front of the box and
your head with a black cloth. Do you get a beautiful picture
on the white paper at the bottom of the box?
Experiment No. 127.
A
moving-picture show.
Use the camera obscura on a
table outdoors or near a window and let two of you get under
the black cloth and look at the picture, while two others go
through funny antics outdoors about 30 feet from the camera.
Do those under the cloth see a very funny moving-picture show?
Change places and repeat.
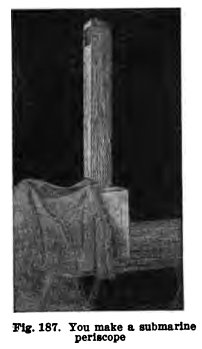
Experiment No. 128.
A submarine periscope.
Arrange the apparatus as in
Fig, 187 with the mirror at 45° at the top of a long cardboard
tube and observe
the paper under the black cloth. Do you get a fine picture on
the paper?
This illustrates the construction of one type of submarine
periscope.
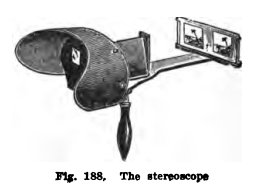
The Stereoscope (Fig. 188) turns two pictures
into one that stands out. The glasses are prismatic
lenses placed edge to edge; they take light from the two
pictures A1B1, A2B2, Fig. 189, and diverge it
so that it appears to come from one pic-
GILBERT LIGHT
EXPERIMENTS 123
ture AB. The pictures are taken
in a stereoscopic camera, which is simply two cameras side by
side and a short distance apart.
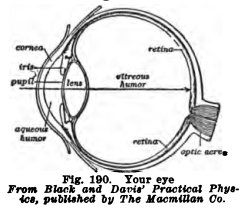
Your Eye (Fig. 190) has an outer horny
membrane called the cornea and behind this a watery liquid
called the aqueous humor, behind this a muscular lens called
the crystalline lens and inside this another fluid called the
vitreous humor. At the back is the nerve layer, the retina,
which receives the sight impression, and behind the retina is
a black coating which shuts out all light except that which
comes through the lens. The colored part of the eye is the
iris and the opening in the iris is the pupil. The iris
contracts the size of the pupil in a strong light and enlarges
it in a dim light.
The eye is very much like a
camera, but there is one striking difference: the camera
is focused by moving the lens back and forth; but the eye
is focused by changing the shape of the lens and, therefore,
its focal length. The muscles of the eye make the crystalline
lens more convex when we view an object near at hand and less
convex when we view one at a distance.
124 GILBERT BOY
ENGINEERING
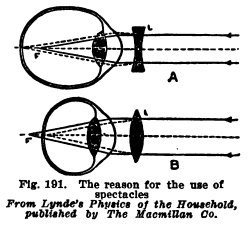
Spectacles. The eyes of short-sighted people
focus the light in front of the retina F, Fig. 191 A, and this
difficulty is overcome by spectacles with diverging lenses, L.
The eyes of long-sighted people focus behind the retina F, Fig. 191 B, and this
difficulty is corrected by spectacles with converging lenses,
L.
Experiment No. 129.
To look through your hand.
Your two eyes look along
converging lines when you look at any object, and this
leads to the following apparent magic. Roll a piece of paper
into a tube, hold it beside your hand, look at your hand with
one eye and through the tube with the other. Do you appear to
see through your hand? Look through other things in this way.
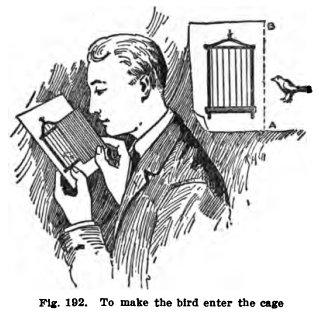
Experiment No. 130.
To put the bird into the cage.
Draw a cage and a bird with
centers about 2 inches apart on paper, stand a card on the
line AB between them
(Fig. 192), then look at
GILBERT LIGHT
EXPERIMENTS 125
the cage with one eye and at
the bird with the other. Does the bird enter the cage?
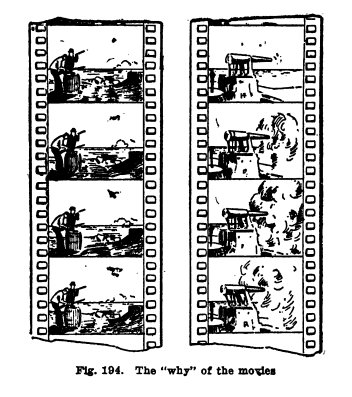
The Moving-Picture Machine
(Fig. 193) throws 12 to 16 pictures on the screen each second
and shuts off the light while one picture is changing to the
next. The pictures are taken at the same intervals and differ
very slightly one from the next (Fig. 194).
The "Why" of the Movies. The reason you see
the pictures continuously and are not aware that the light has
been shut off is that your eyes retain each picture for a
short time after it has left the screen. You will now
illustrate this.
Experiment No. 131.
Circles of fire.
Go into a dark room, light a match, blow it out but keep the
live coal, and then wave
126 GILBERT BOY
ENGINEERING
it in the air. Do you see
circles of fire? You do, because your eye retains the
impressions for some time.
Experiment No. 132.
To put the bird
into the cage.
Draw a bird on one side of a
piece of cardboard and a cage exactly opposite on the other
side. Attach cords above and below and spin the cardboard.
Does the bird appear to enter the cage? It does, because your
eyes retain the pictures of the cage and bird for a short
time.
[Advertisements at the end of the book!]
In the Dark!
A knock on the head with a
hatchet or a stab with a knife doesn't sound pleasant, but
you'll enjoy apparent treatment of this kind and so will your
friends who watch your shadow show. Make your boy friend rise
in the air - change him into a bird or a cat - create freakish
images. It's easy! And laugh - your audience sure will enjoy
it because it's new - nothing like it. An entertainment made
for boys who want real fun. But that's only a few of the many
things you can do with
GILBERT LIGHT EXPERIMENTS
One of these
outfits will help you to understand a great many facts
about light. You can perform a number of experiments
which explain the laws of light. Learn about the movie
machine, the telescope and other optical instruments.
There's a big book on Light with each set, it's a handy
size, just right to put in your pocket
From this book and your set you'll get a knowledge
of light that will be helpful to you always. It's great
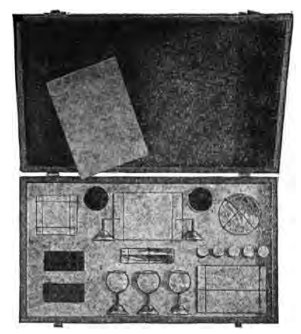
fun too, the kind you like. The outfit is complete with
prisms, mirrors and all the apparatus you'll need to
perform the experiments.
Ask your dealer to shew
you this new Gilbert toy. If he hasn't it write
THE A. C. GILBERT COMPANY
507 Blatchley Ave., New Haven, Conn.
In Canada - The A. C Gilbert-Menzies Co., Limited, Toronto,
Ont.
In England - The A. C. Gilbert Co, 125 High Holborn, London,
W. C. 1
"The Science Notebook" Copyright 2008-2018 - Norman
Young
 The
Science Notebook
The
Science Notebook